
Getting Started with TapCard
Go from your first login to your first rewarded customer, one step at a time.
Set up your dashboard, create your card and put your QR code on display.
Add your staff, connect the scanner and start rewarding customers.
1Welcome
This guide gets your TapCard loyalty program ready to use. Follow the steps in order.
The TapCard team creates your merchant account and sends you your login details. Haven't received them? Contact support.
2Access your Merchant Dashboard
- 1Open the Merchant Dashboard
Go to app.tapcard.pk.
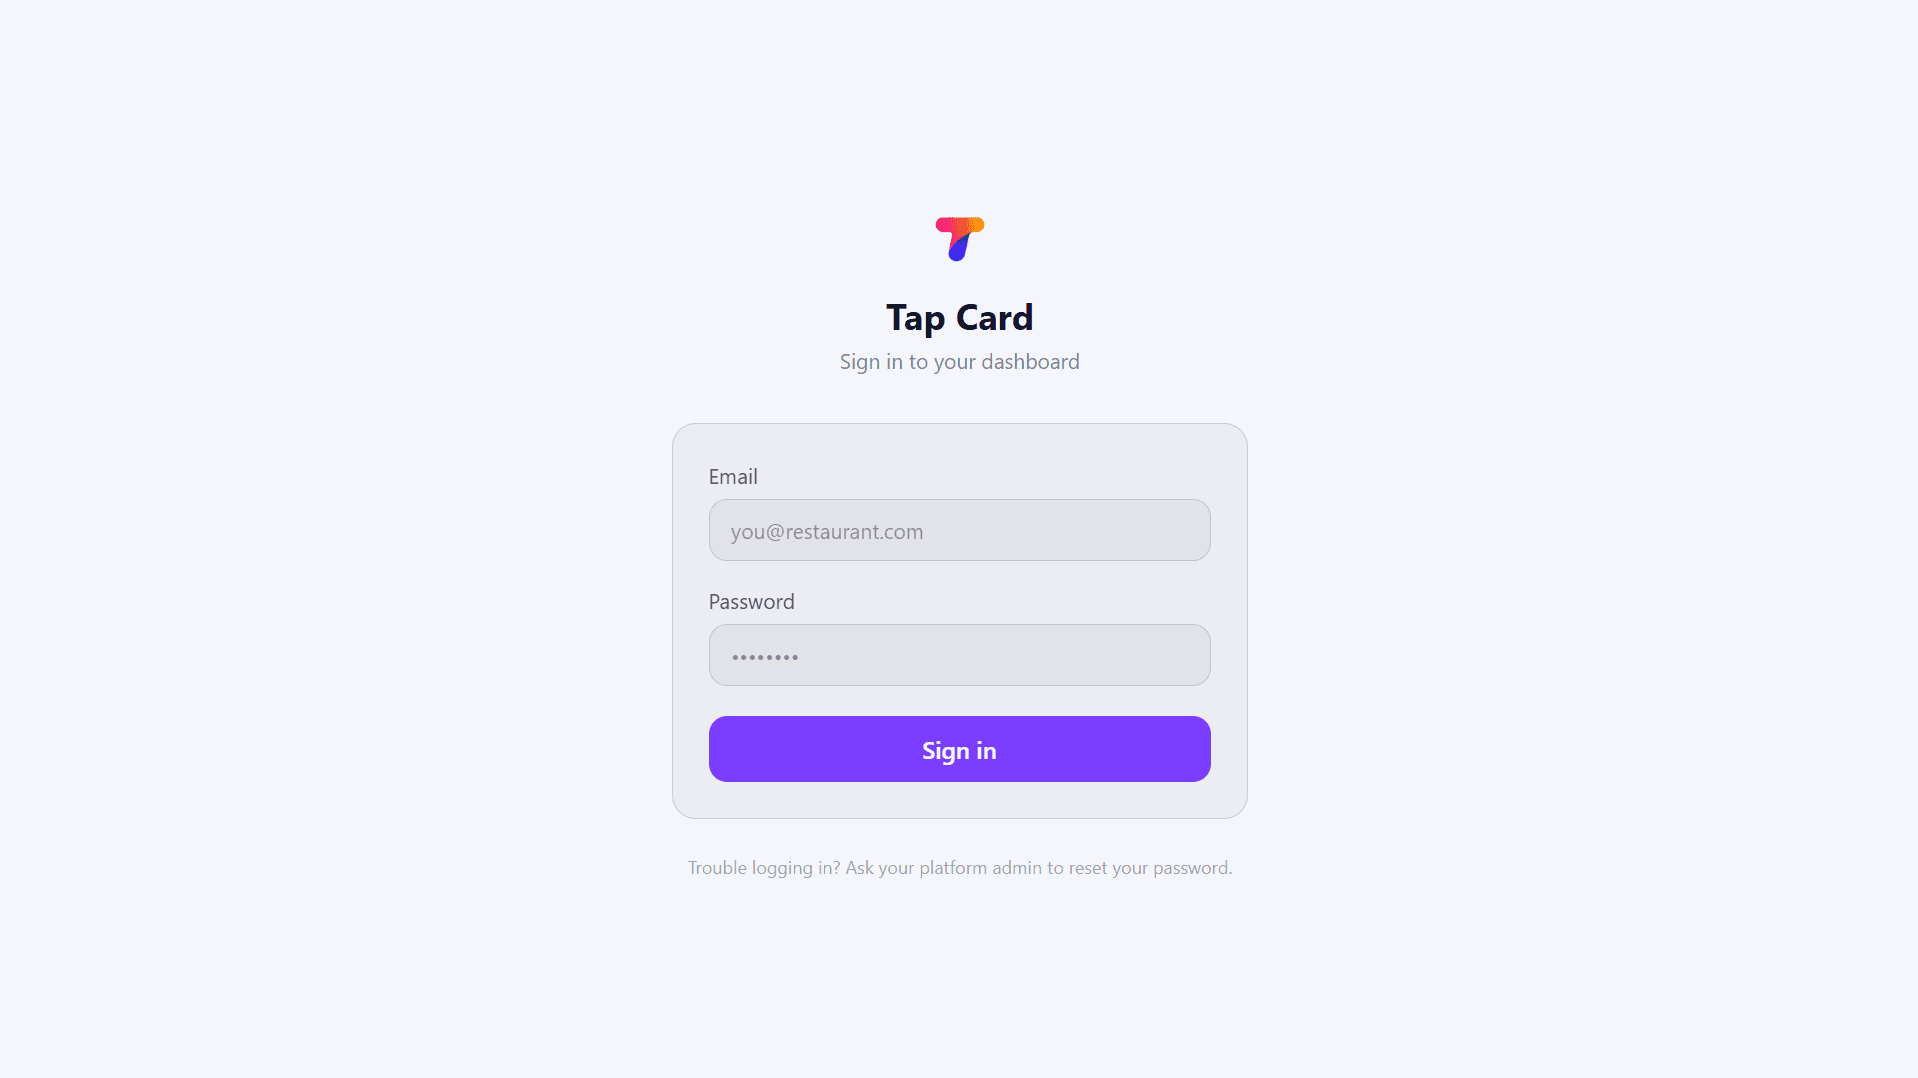
- 2Sign in
Use the login details the TapCard team sent you. You can change your password later in Settings.
3Add your branch
Branches are the locations where customers earn stamps. Add at least one before you create a card.
- 1Open Branches
In the dashboard menu, click Branches.
- 2Enter the branch details
Under Add a branch, type a Name and fill in Latitude and Longitude - or click Use my location if you're at the branch.
- 3Add lock-screen text (optional)
A short message shown to customers near your branch. Apple Wallet only.
- 4Click Add branch
It appears under Existing branches.
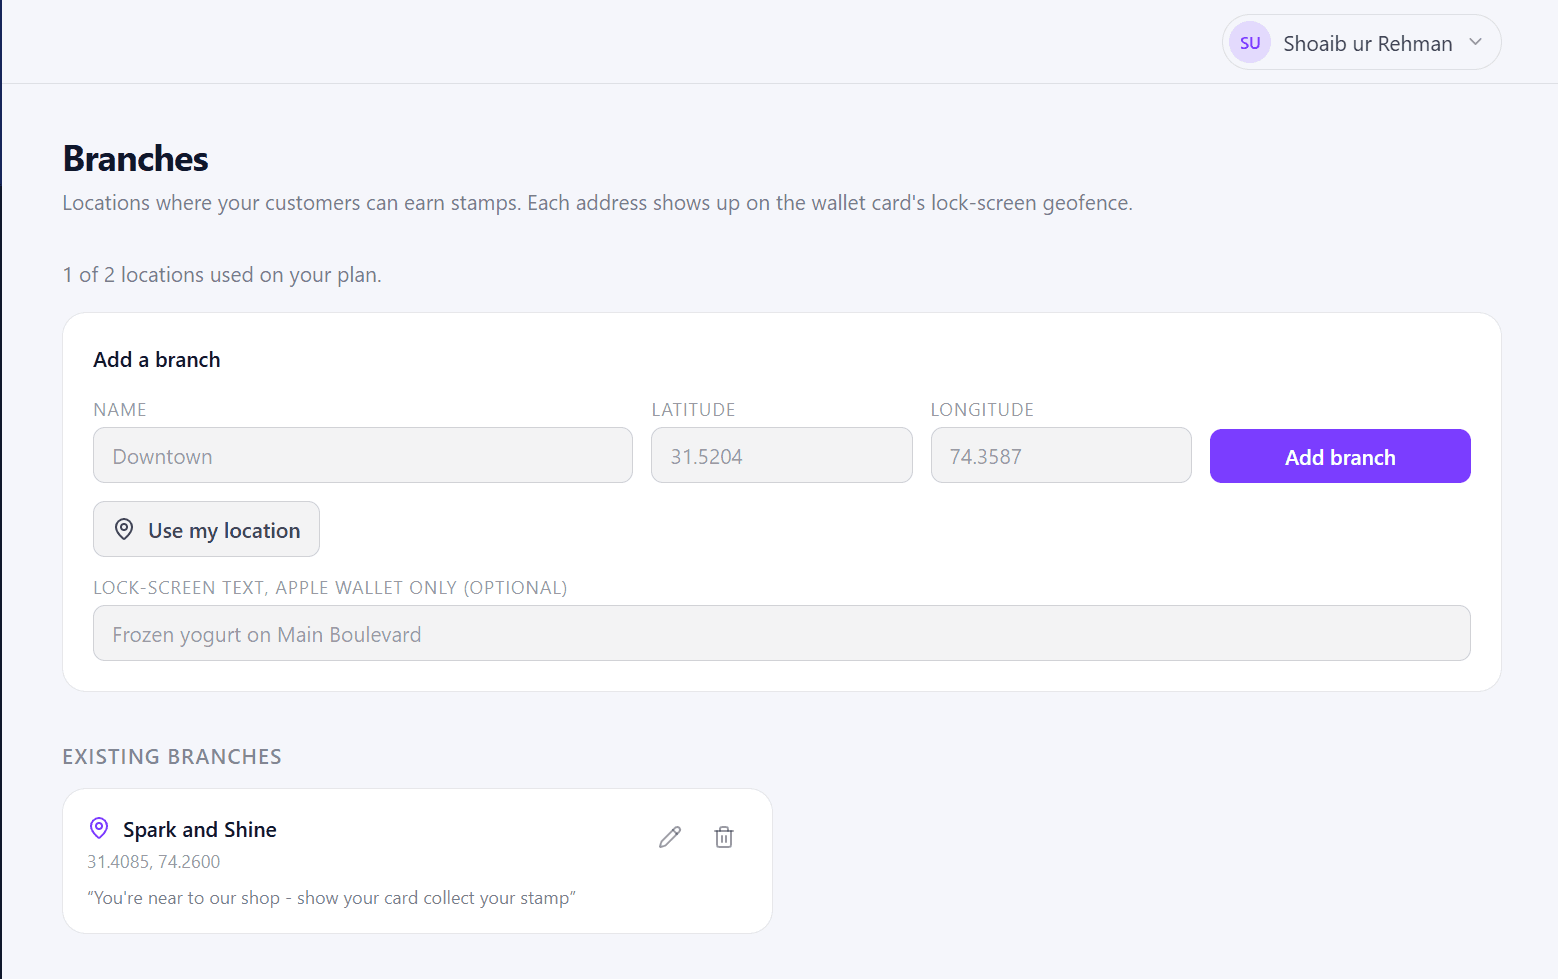
How many branches you can add depends on your plan.
4Create your first card
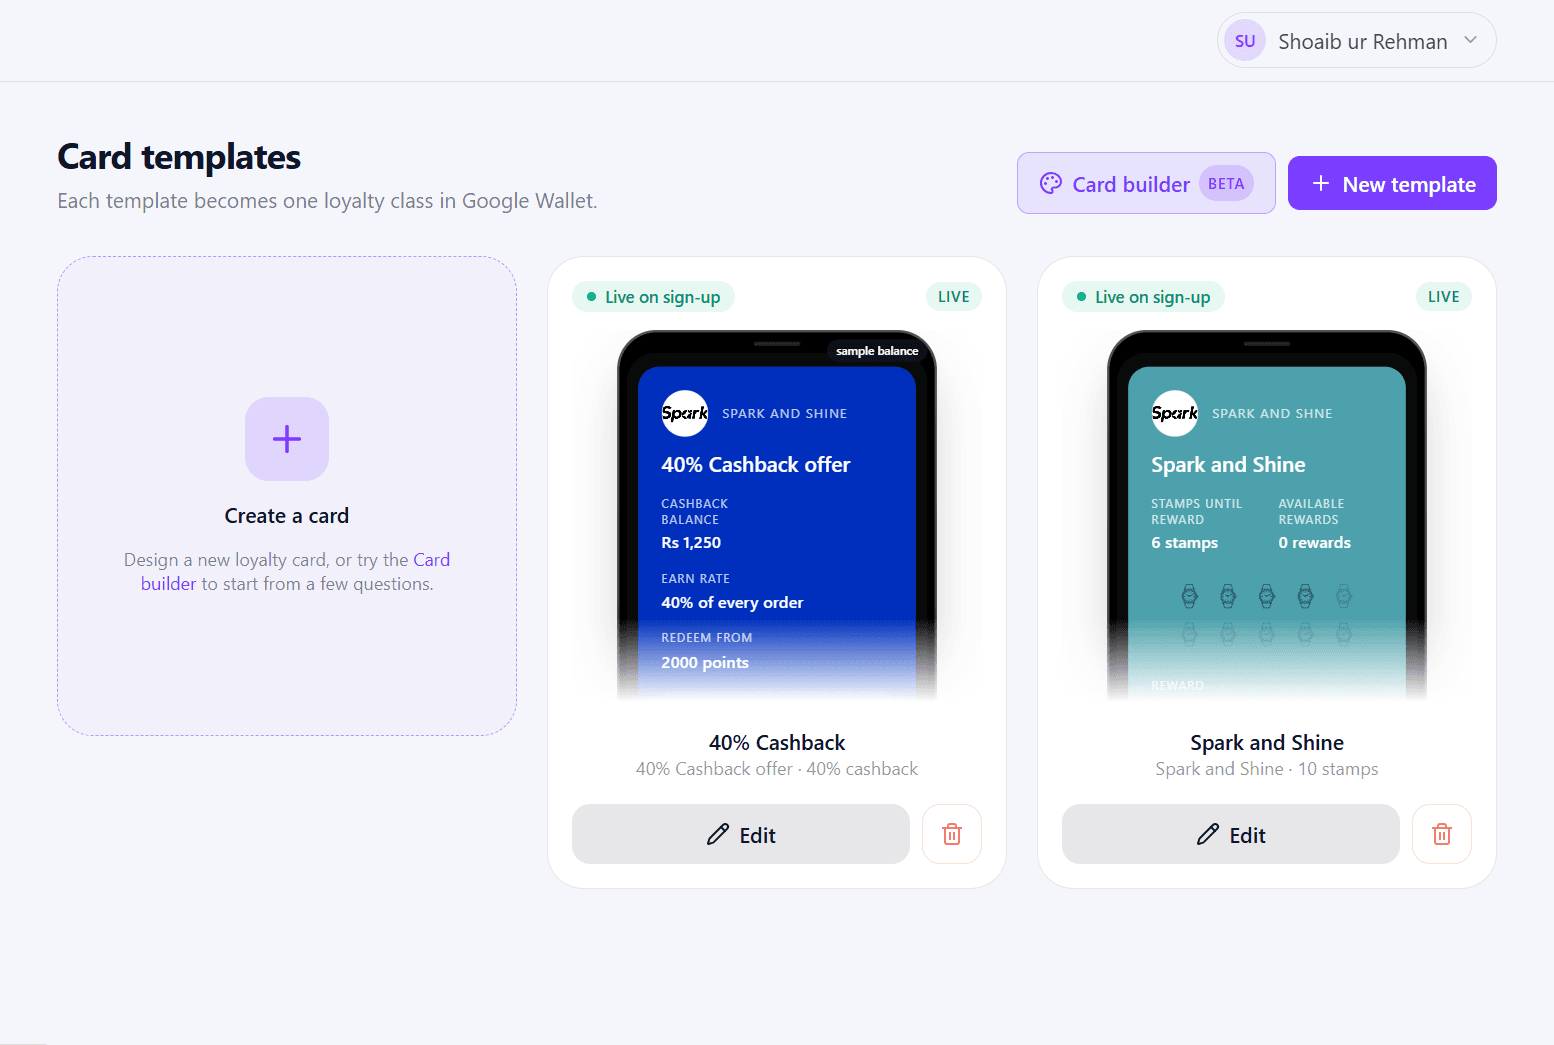
Your card is what customers save to their phone and collect stamps on. In the dashboard it's called a card template.
- 1Open Card templates
In the dashboard menu, click Card templates.
- 2Start a new card
Click New template or the Create a card tile. Prefer a guided setup? Try Card builder (beta) instead.
- 3Choose Stamp card
Customers collect stamps and earn a reward when they reach the target. Click Next.
- 4Work through the remaining steps
Fill in each step and click Next. The Live preview shows how your card will look.
- 5Click Create template
Choose your program name carefully. It's hard to change once Google approves it.
5Enable Public Signup
Public Signup lets customers find your card on your signup page and add it themselves. You set it while creating the card.
- 1Go to the Sign-up step
It's step 5 of 7 in New card template.
- 2Keep Show on signup page ticked
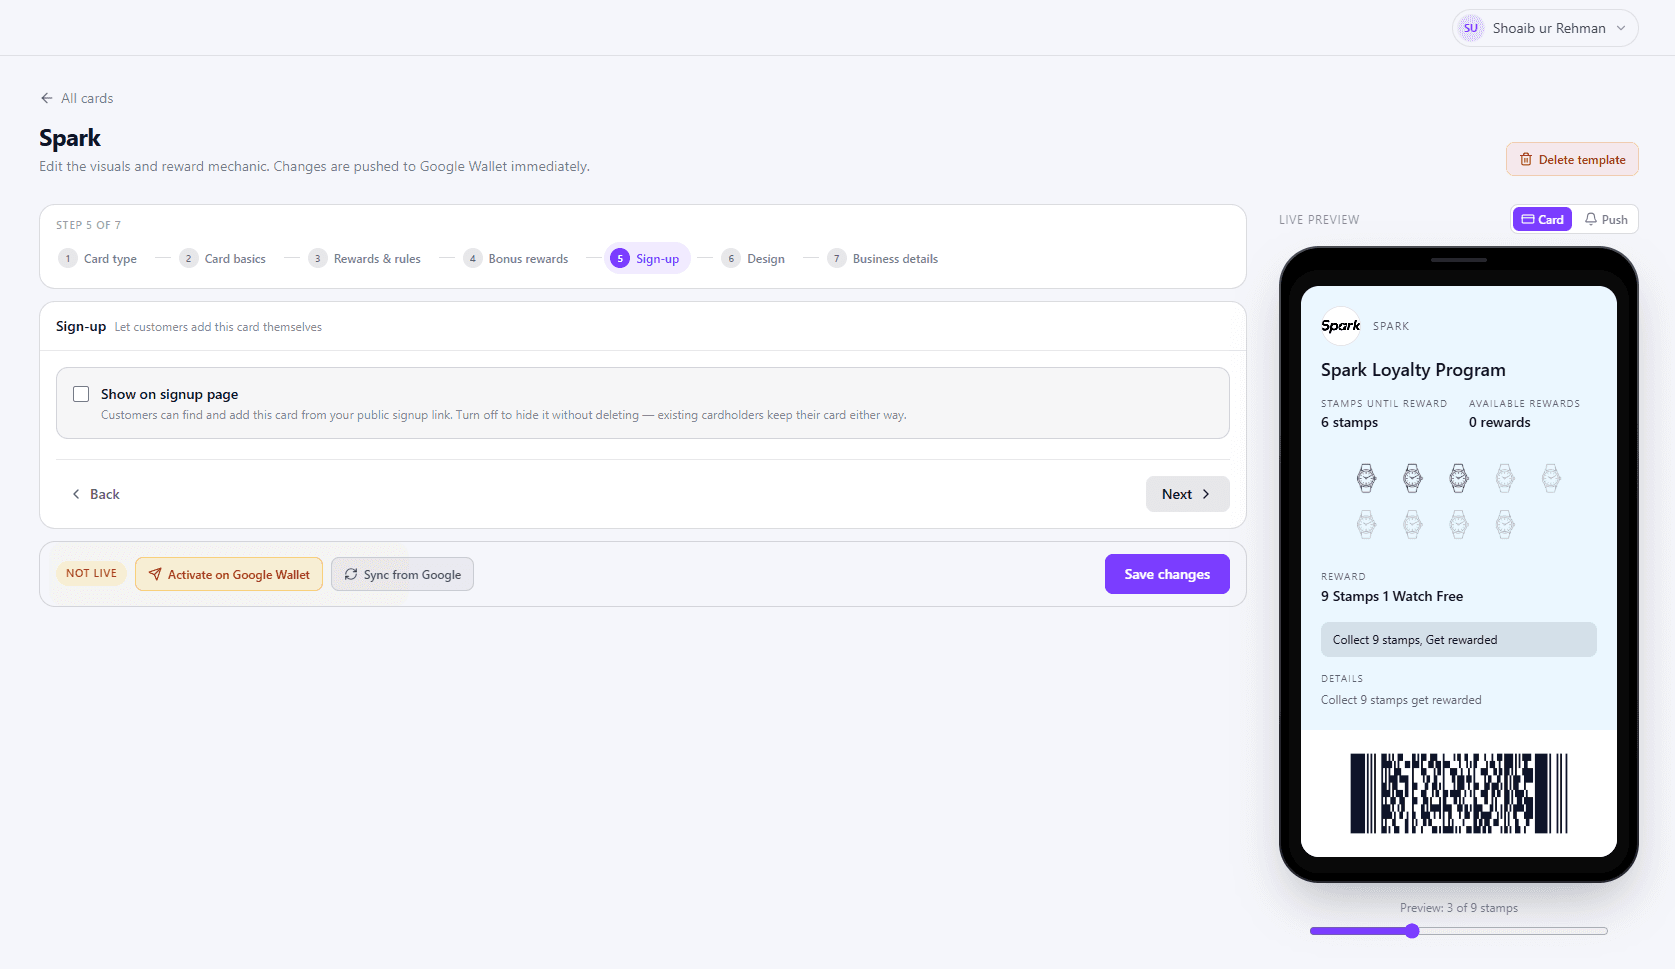
Cards on your signup page show a Live on sign-up badge. To change it later, click Edit on the card. Turning it off hides the card from new customers - existing cardholders keep theirs.
6Activate & sync Google Wallet
This puts your card in Google Wallet so customers can save it. Do these steps in order.
- 1Open your card
In Card templates, click Edit on your new card. It shows a Not live badge.
- 2Click Activate on Google Wallet
- 3Click Sync from Google
The badge changes to Live.
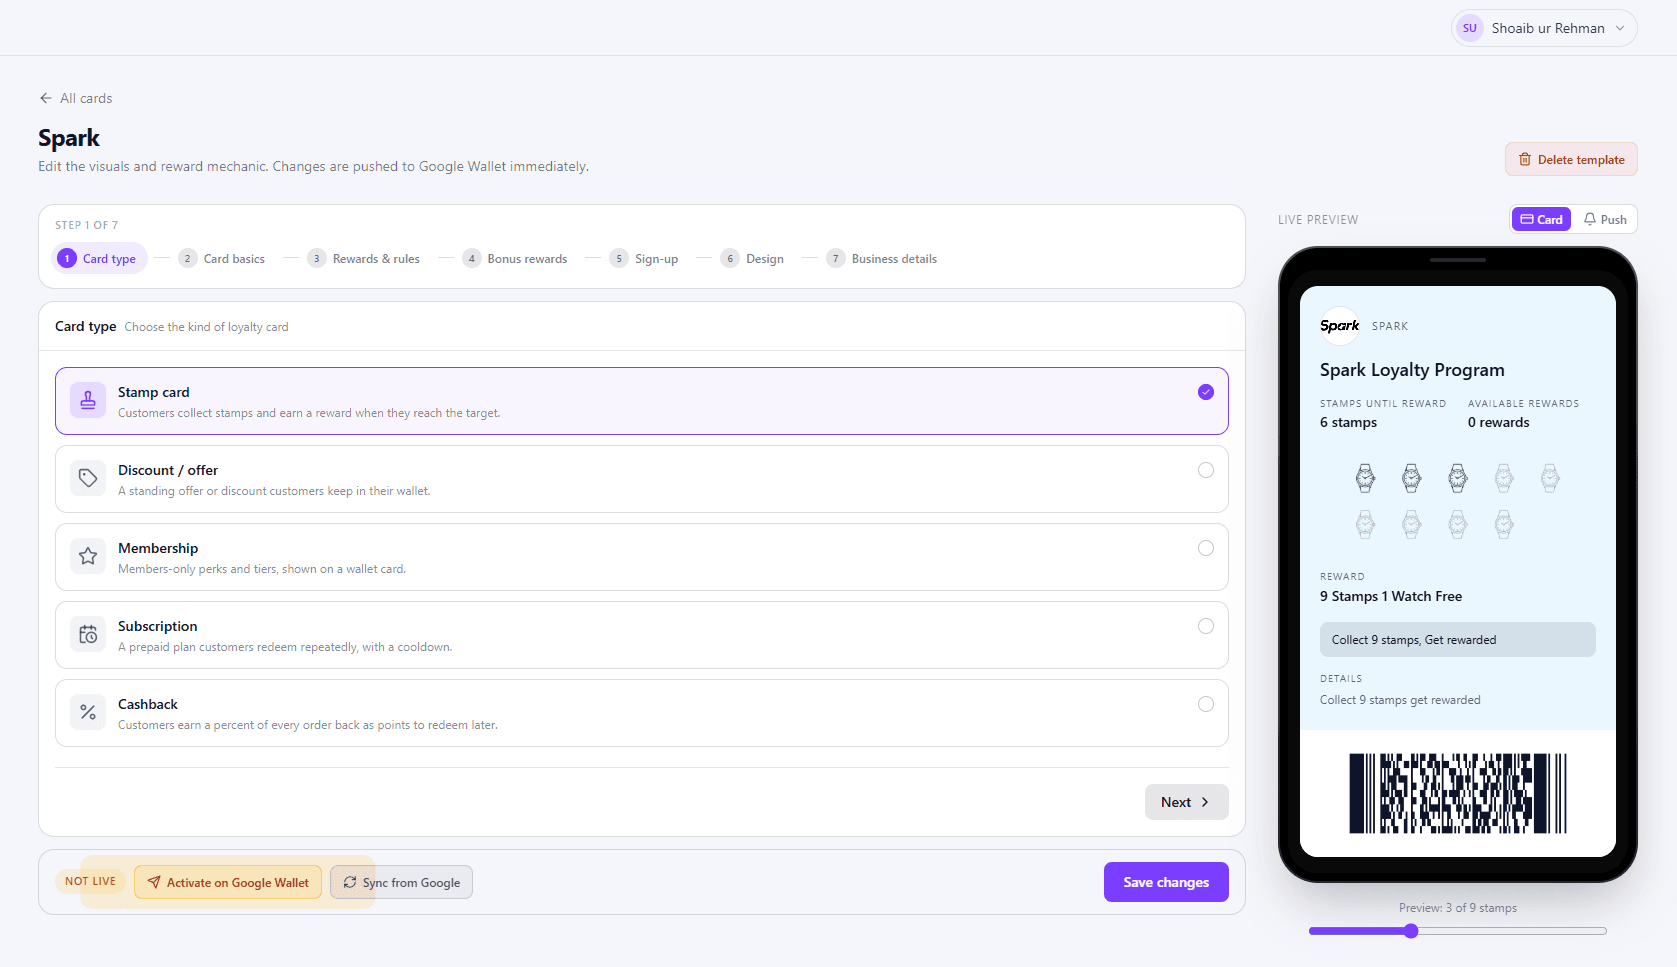
After your card is live, any changes you save are pushed to Google Wallet straight away.
7Share your QR code
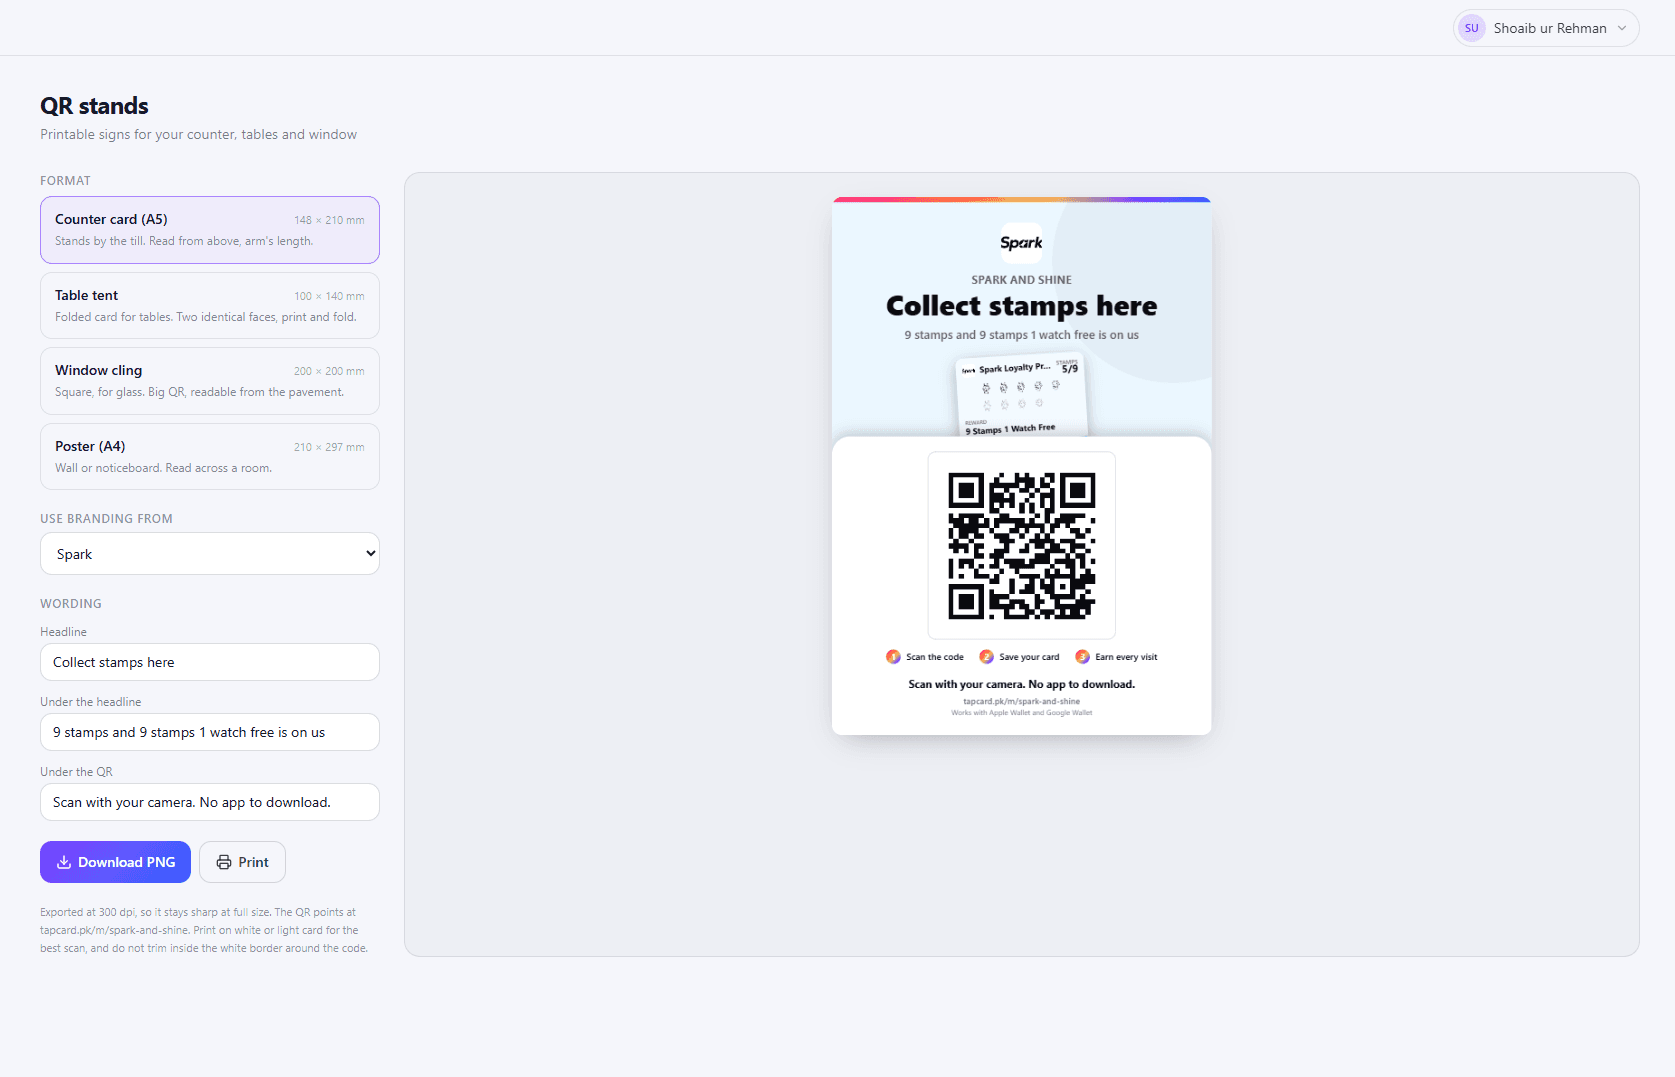
Customers join by scanning your QR code. TapCard turns it into a ready-to-print sign called a QR stand.
- 1Open QR stands
In the dashboard menu, click QR stands.
- 2Choose a format
Counter card, Table tent, Window cling or Poster.
- 3Pick your branding and wording
Choose a card under Use branding from, and edit the text if you like.
- 4Download or print
Click Download PNG or Print. Print on white or light card, and don't trim the white border around the code.
- Scan QR
- Open Signup Page
- Sign Up
- Add TapCard to Google Wallet
Scan your own QR code and add the card to your phone before sharing it with customers.
8Add staff
Give everyone who scans cards their own login, so every stamp and reward is recorded against them.
- 1Open Staff
In the dashboard menu, click Staff.
- 2Enter their details
Under Add a staff member, fill in Name, Email and a 6-digit PIN.
- 3Choose a branch and role
Cashier can scan, stamp and redeem. Manager can also view customers. Owner can also manage staff.
- 4Click Add staff member
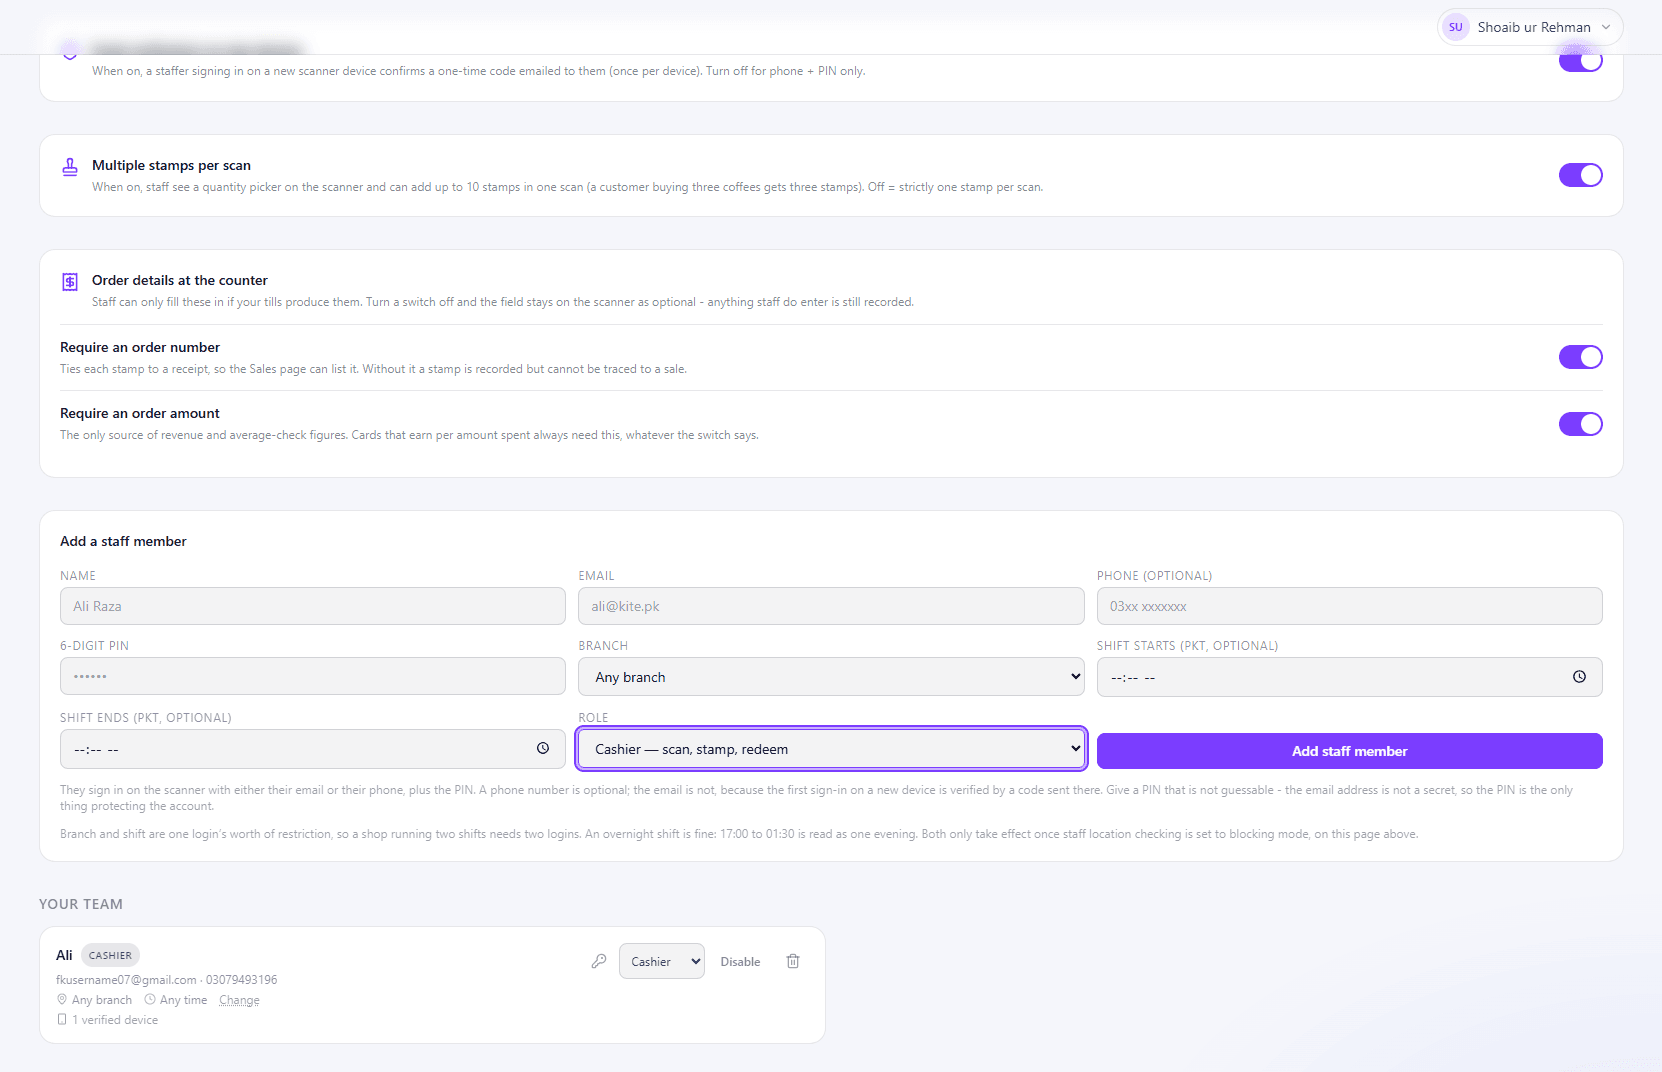
The settings at the top of the Staff page apply to all staff, e.g. Multiple stamps per scan. Check them before staff start scanning.
9Activate the Scanner App
The scanner needs an API key from the TapCard team before it can be used. Don't have one? Contact support.
- 1Open the Scanner App
On the device your staff will scan with, go to scanner.tapcard.pk/setup.
- 2Enter your API key
Leave API URL as it is and paste your key (it starts with
tc_live_) into Scanner API key. - 3Click Connect
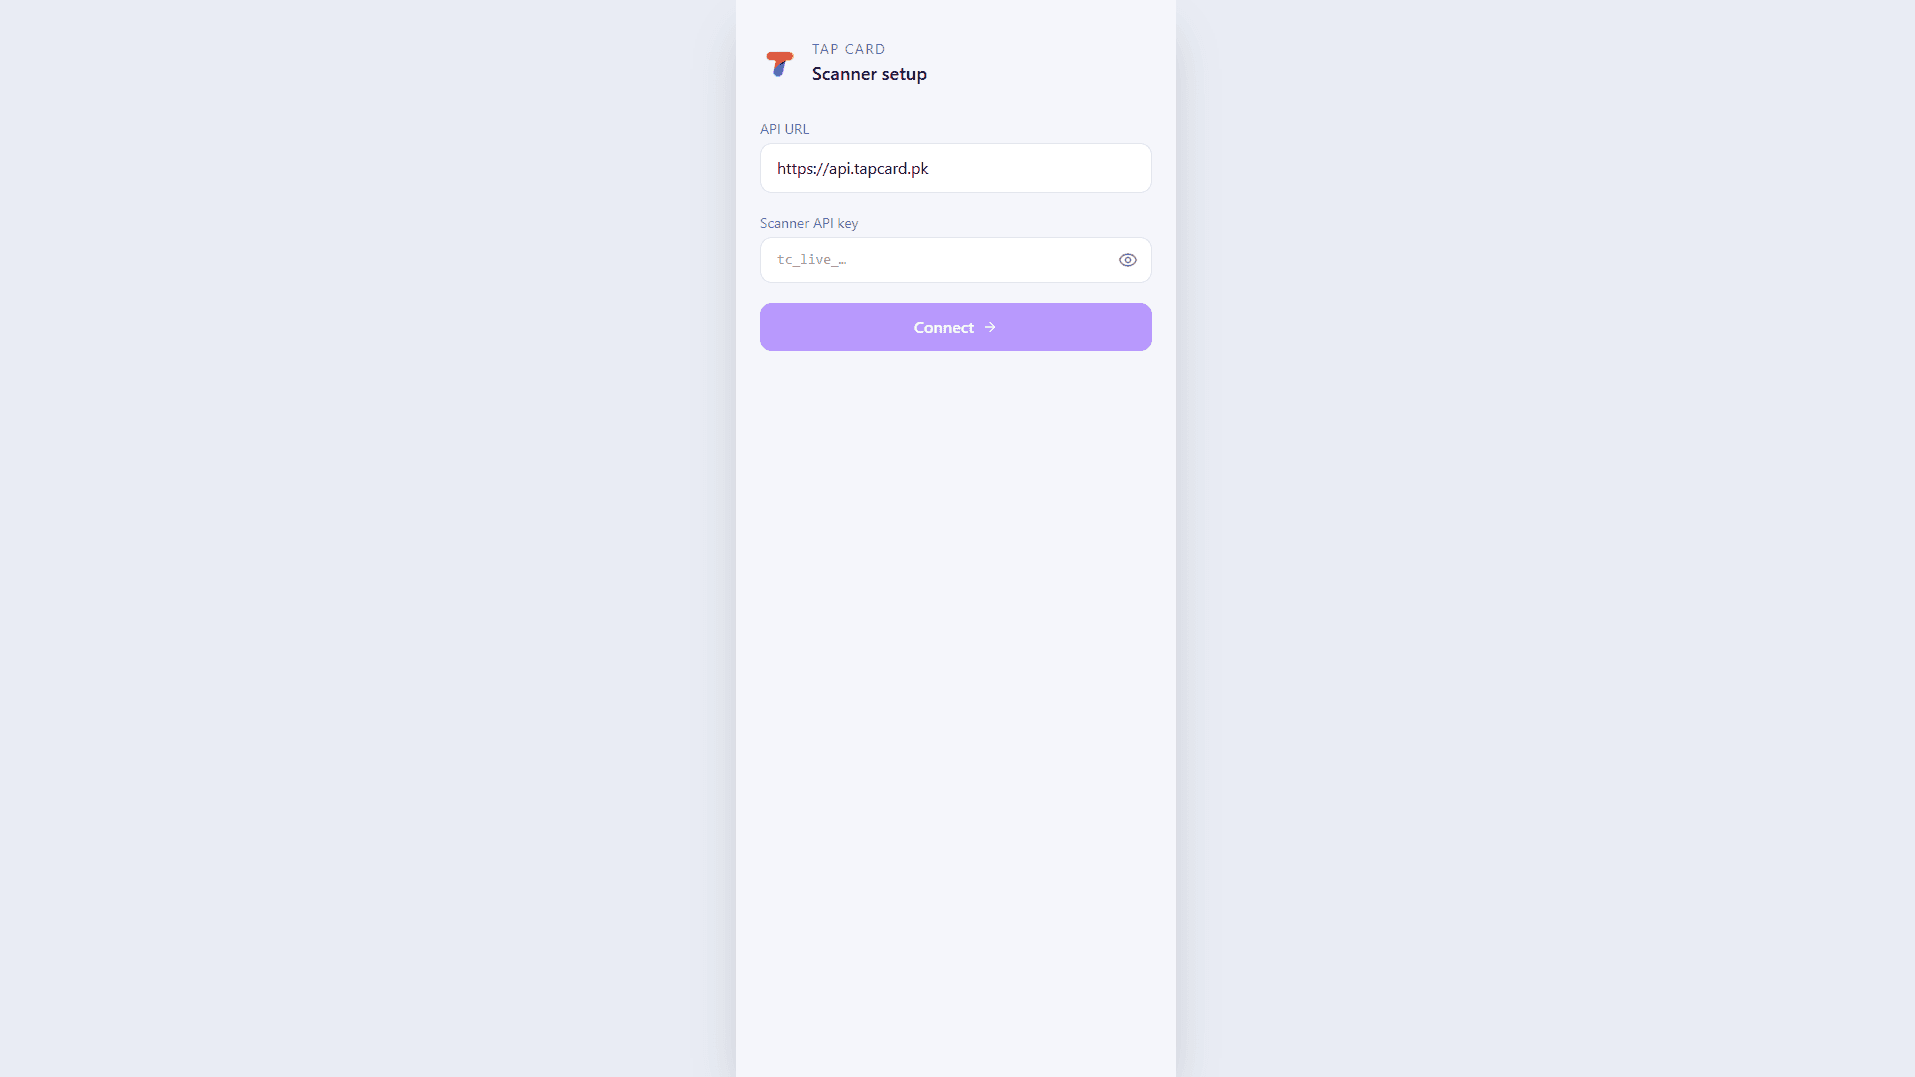
Keep your API key private.
10Staff login & start scanning
- 1Staff sign in
In the Scanner App, staff use their email and 6-digit PIN. On a new device they may also need a one-time code sent to their email.
- 2Scan the customer's card
The customer opens their card in their wallet and staff scan the code. The customer earns a stamp.
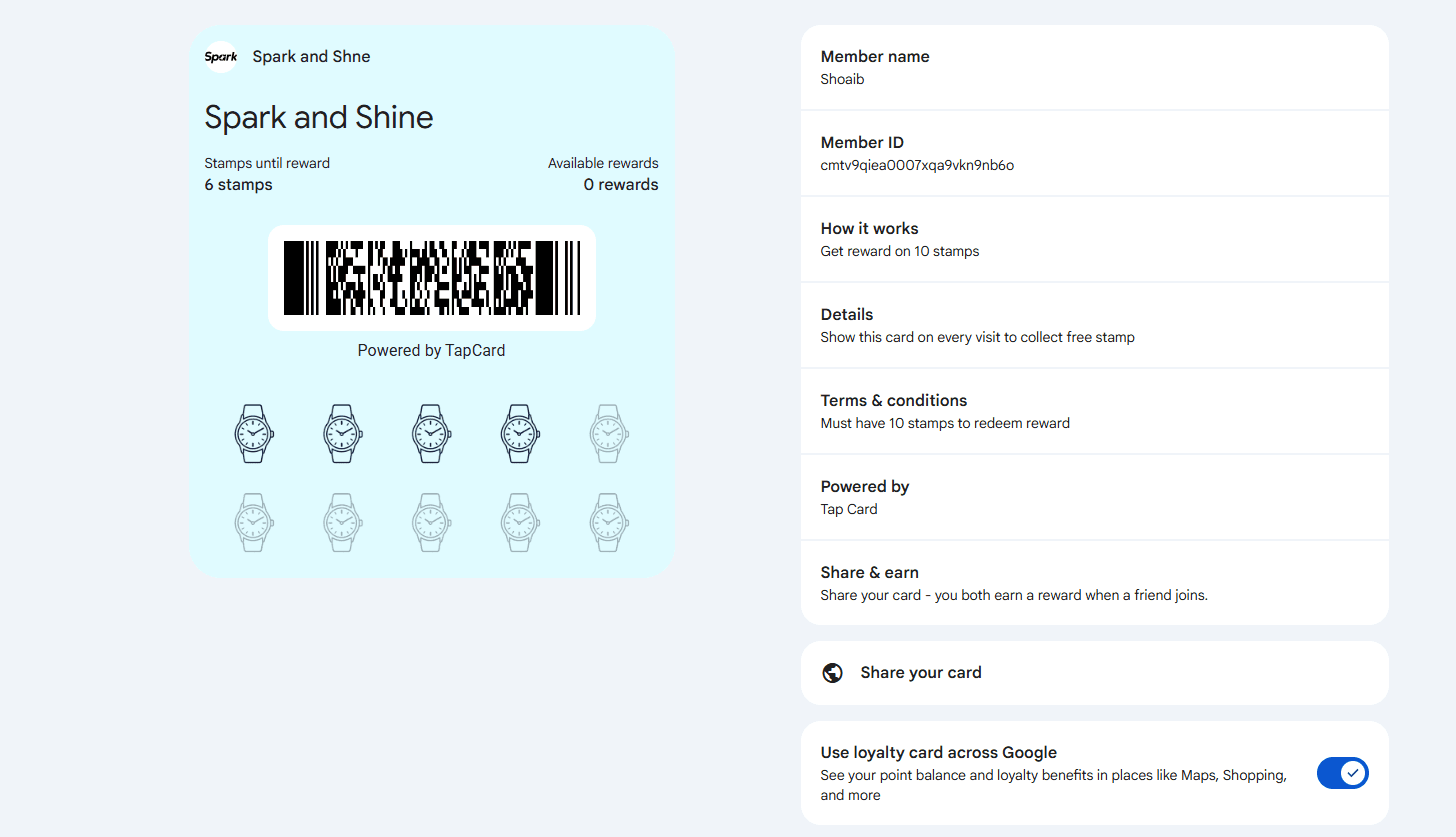
11Completing stamps & reward
When a customer collects all their stamps, their reward is ready. Staff give it to them with the same scanning workflow.
- Customer completes stamps
- Customer returns
- Staff scans card
- Customer receives reward
Quick Start checklist
Tick these off as you go. Your progress is saved on this device.