
Your Branches
Add the locations where customers earn stamps, and keep them up to date.
What is a branch?
A branch is one of your shops or outlets - a place where customers earn stamps. Add at least one before you create a card.
- Add your branch
- Create your card
- Customers visit
- Staff scan
- Stamps are recorded
1Add a branch
- Go to Branches
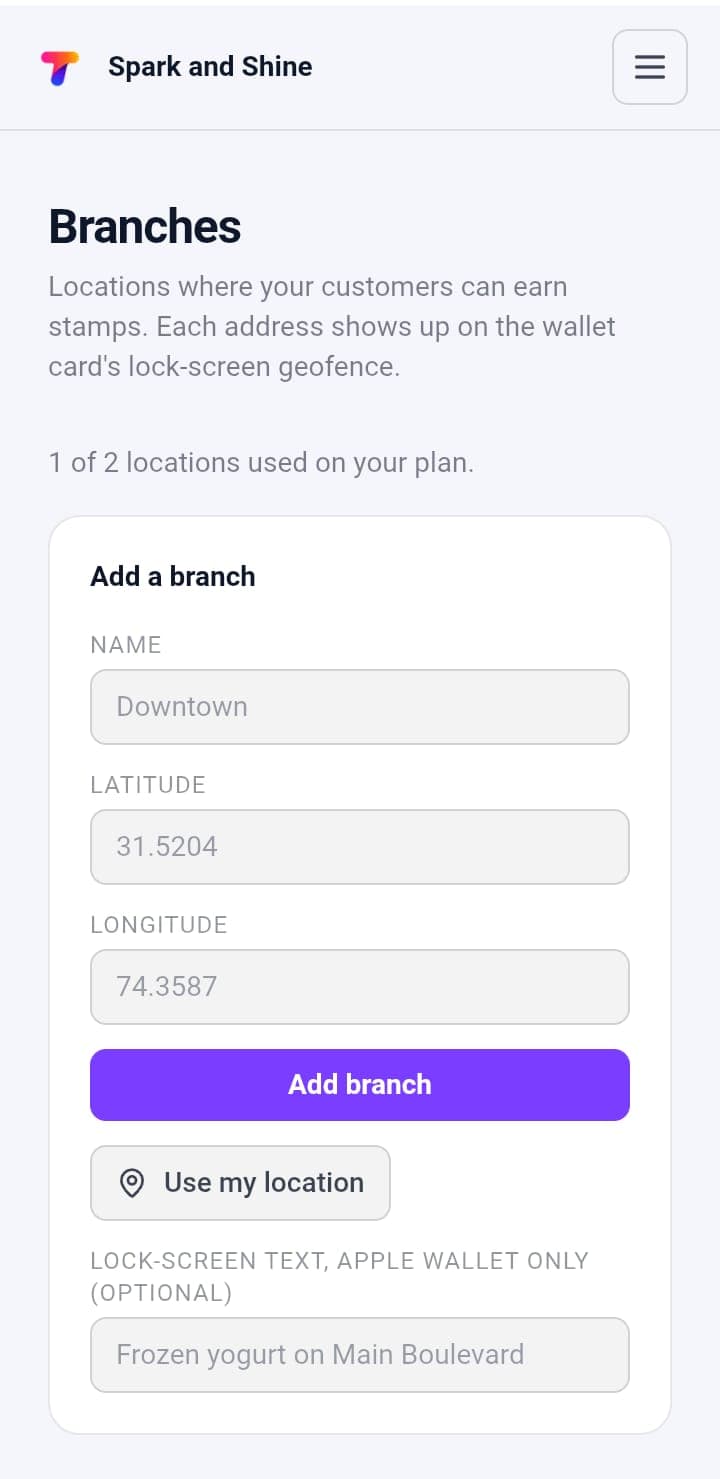
In the dashboard menu (☰ on a phone).
- Enter the branch details
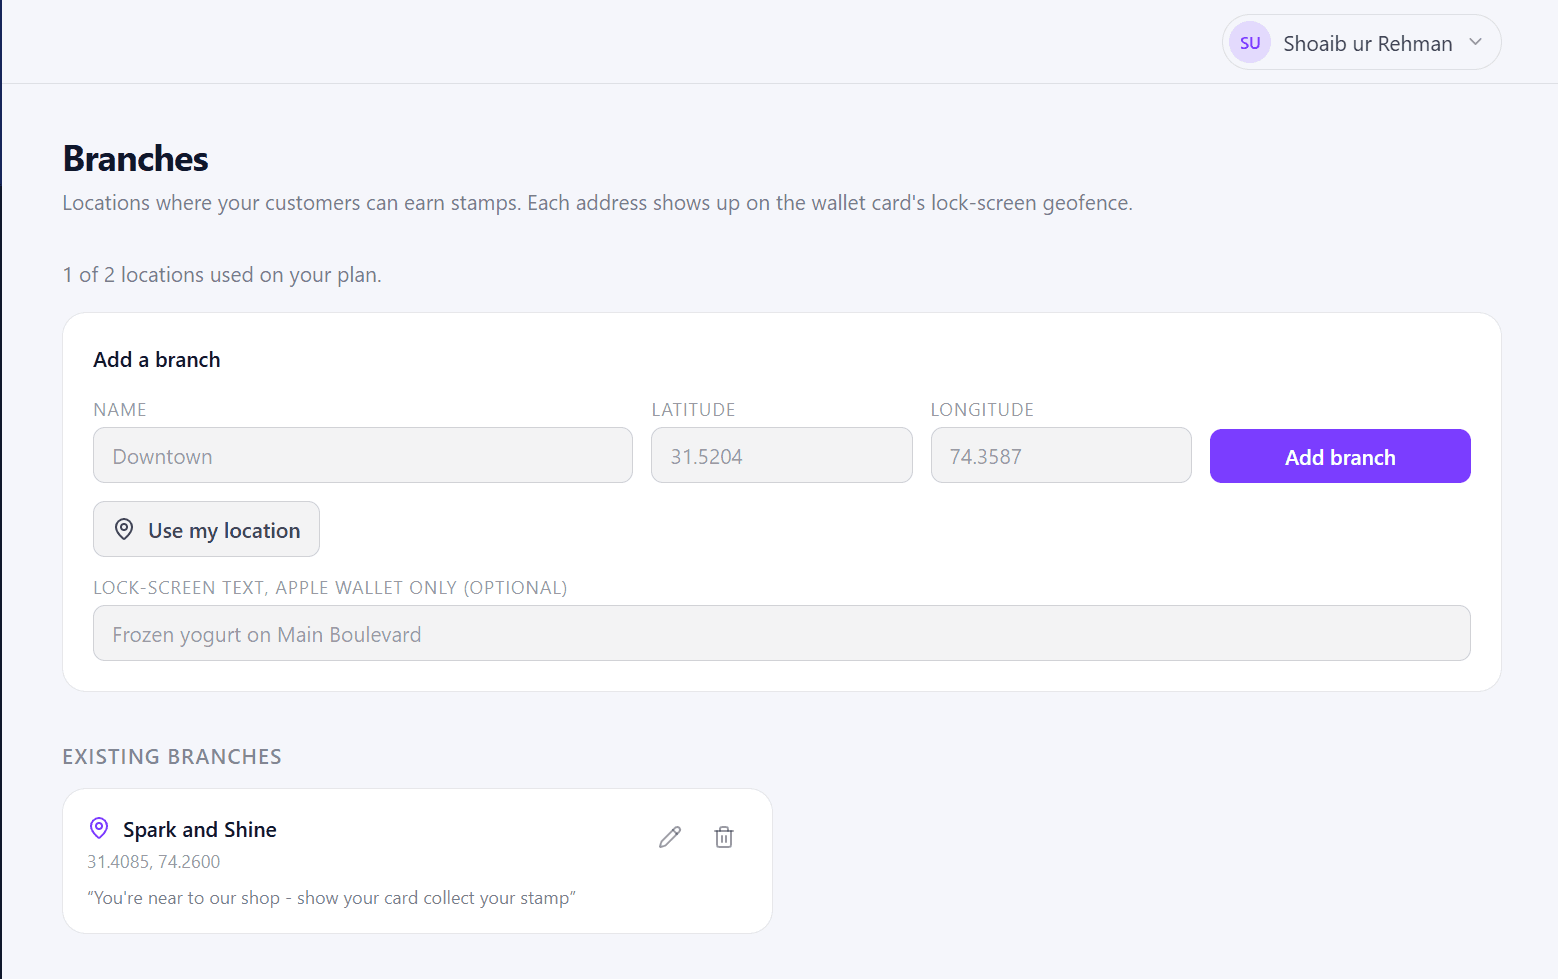
Under Add a branch: a Name (e.g. Downtown), then Latitude and Longitude - or click Use my location if you're at the branch.
- Add lock-screen text (optional)
A short message for customers near this branch, e.g. "You're near our shop - show your card to collect your stamp". Apple Wallet only.
- Click Add branch
2Edit or remove a branch
Your branches are listed under Existing branches. Click the pencil icon to edit one, or the bin icon to delete it.
The number of branches you can add depends on your plan. The page shows how many you've used, e.g. 1 of 2 locations used on your plan.
3Where your branches are used
- On your card - choose Geofenced Branches in the card's Business details step. See Create a Card.
- For your staff - pick each staff member's Branch when you add them. See Set Up Staff & Scanner.
What's next?
Branch added? Now Create a Card.